This post was translated from the original with AI assistance. Read the original
The Command Pattern is one of the design patterns you run into all the time in game development: key binding settings, AI command streams, undo and redo, and so on all use it. In this post I’ll explain how the Command Pattern works and how to apply it in Unity.
Design patterns are at the core of optimizing a game’s overall program architecture. This post is based on Game Programming Patterns, applying the principles from the book to real Unity projects.
The Command Pattern#
“Encapsulate a request as an object, thereby letting users parameterize clients with different requests, queue or log requests, and support undoable operations.” —GoF
Above is the Gang of Four’s explanation of the Command Pattern. My own understanding is this: the Command Pattern wraps commands in an abstract class or virtual base class, from which you can derive all kinds of different commands, each carrying out its own logic. Where needed, you can add fields and methods so that commands can be undone and redone.
Here’s the simplest prototype of a command class as I understand it:
public class Command
{
    protected virtual void Execute() {  }
}
Configuring Input#
I believe every well-thought-out game has key bindings in its settings menu. Key bindings are generally implemented with the Command Pattern.
Each key maps to a Command object. Whatever key you press, it does whatever that key is bound to do (calls the Command’s Execute() method, even if that ends up doing nothing at all).
Take the NES game Contra as an example: press A to fire, press B to jump. Here’s how to implement that in Unity.
Define the Command Base Class and the Player Class#
public class Command
{
    public virtual void Execute(Player player) { }
}
The Player class has a Shoot() method and a Jump() method. Here I’m just using Debug in place of the real logic.
using System.Collections;
using System.Collections.Generic;
using UnityEngine;

public class Player : MonoBehaviour
{
    public void Shoot()
    {
        Debug.Log("Shoot");
    }

    public void Jump()
    {
        Debug.Log("Jump");
    }
}
Define the Shoot Command Class and the Jump Command Class#
Shoot command class:
public class ShootCommand : Command
{
    public override void Execute(Player player)
    {
        player.Shoot();
    }
}
Jump command class:
public class JumpCommand : Command
{
    public override void Execute(Player player)
    {
        player.Jump();
    }
}
Define the Input Handler Class#
using System.Collections;
using System.Collections.Generic;
using UnityEngine;

public class PlayerInputHandler : MonoBehaviour
{
    private Player player;

    public static Dictionary<KeyCode, Command> keyBindDic = new Dictionary<KeyCode, Command>();

    private void Start()
    {
        player = GetComponent<Player>();
        InitBind();
    }

    private KeyCode currentKey;

    private void HandleInput()
    {
        if (Input.anyKeyDown)
        {
            Event e = Event.current;
            if (e.isKey)
            {
                currentKey = e.keyCode;
                if(currentKey.ToString()!="None")
                {
                    Debug.Log("You pressed the " + currentKey + " key");
                }
                if (keyBindDic.ContainsKey(currentKey))
                {
                    keyBindDic[currentKey].Execute(player);
                }
            }
        }
    }

    private void InitBind()
    {
        keyBindDic.Add(KeyCode.A, new ShootCommand());
        keyBindDic.Add(KeyCode.B, new JumpCommand());
    }

    private void OnGUI()
    {
        HandleInput();
    }
}
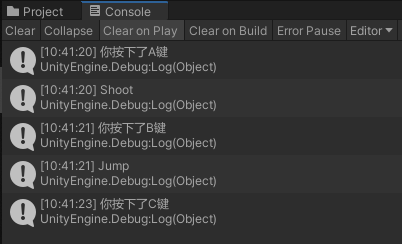
The key-to-command mapping is stored in a Dictionary. On initialization, A is bound to shoot and B to jump.
With the code written, create an empty GameObject in the scene, drag both Player.cs and PlayerInputHandler.cs onto that same object, and run it to test:
Later on you can freely change the bindings, for example A to jump and B to shoot:
keyBindDic[KeyCode.A] = new JumpCommand();
keyBindDic[KeyCode.B] = new ShootCommand();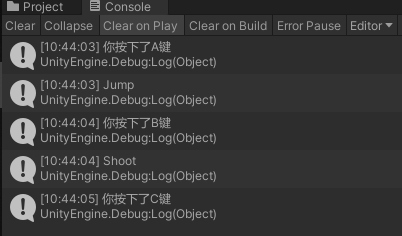
You can even have the A key do nothing at all, and move shooting to the C key:
keyBindDic.Remove(KeyCode.A);
keyBindDic.Add(KeyCode.C, new ShootCommand());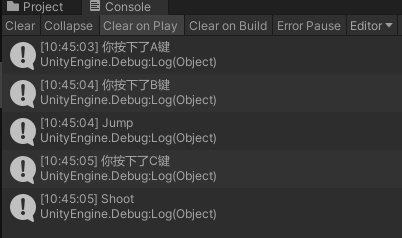
You can really feel how charming the Command Pattern is!
AI Command Streams#
To be continued~
Comments