This post was translated from the original with AI assistance. Read the original
Reposted from my old cnblogs blog: 《30天自制操作系统》Day01 (written 2020-04-05); formatting tidied during migration.
I hereby declare that, starting today, this lazy dog is officially jumping into the deep pit of writing an operating system from scratch, following 30 Days to Make Your Own OS but with more modern tools and ideas. Updates will be irregular (blame my laziness…).
This series won’t go deep into theory; it’s mainly my own hands-on process. For the theory, read the book.
You could follow my progress on GitHub… (the Use30DaysToMakeOS repository no longer exists; see the Wayback Machine copy)
Tools#
The tools the author uses aren’t ones I know, and they aren’t necessarily the best choice either.
For a hex editor, you can use WinHex; I’ll use the free, open-source wxMEdit:

My text editor of choice is Visual Studio Code; pick whatever you like.
For the virtual machine, you can use Virtual Box or VMware. I’ll use VMware Workstation 14 because it’s more powerful.
For assembly, let’s just stick with the author’s nask.exe (the download link died with the repository; it ships in the book’s tool kit); we don’t need to write our own assembler.
We also need a Bash environment. You can use Git Bash; I’m using Cmder.
Editing the image file in hex#
Generating an all-zero image file with dd in Bash#
A floppy disk must be exactly 1440 KB, i.e. 1474560 bytes (1440 * 1024 Bytes, 1 KB = 1024 Bytes).
The img file we’re making only displays hello,world, so most of it is 0.
If you don’t generate it with a command, enjoy typing it all by hand; even copy-and-paste would wear you out.
We use the Bash dd command to quickly generate an all-zero file:
dd if=/dev/zero of=helloos.img count=1474560 bs=1To explain: the dd command reads, converts and outputs data.
dd reads from standard input or a file, converts the data in the given format, and writes it to a file, a device or standard output.
if=filename sets the source file. Here it’s /dev/zero, a device that outputs an endless stream of zeros; how many you take is up to you.
of=filename sets the output file, here helloos.img.
count=blocks copies that many blocks, here 1474560.
bs=bytes sets both the read and write block size to that many bytes, here 1 byte.
So the whole command means: create a file named helloos.img, 1474560 bytes in size, filled with 0.
In the Day01->codes folder, I right-click, open Cmder there and run the command:
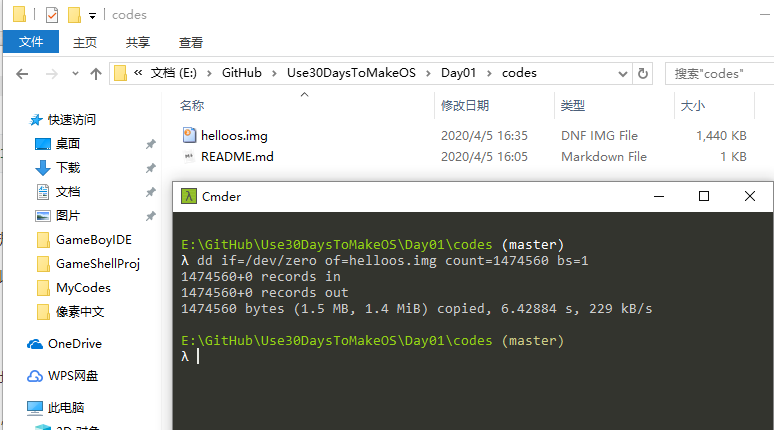
You can see an image file named helloos.img of 1440 KB was created. Success.
Editing helloos.img in a hex editor#
Open the freshly generated helloos.img in the hex editor, then begin the long stretch of copying bytes by hand, and get a taste of the joy of punch-card programming (punch cards were even worse, that’s binary; at least this is hex).
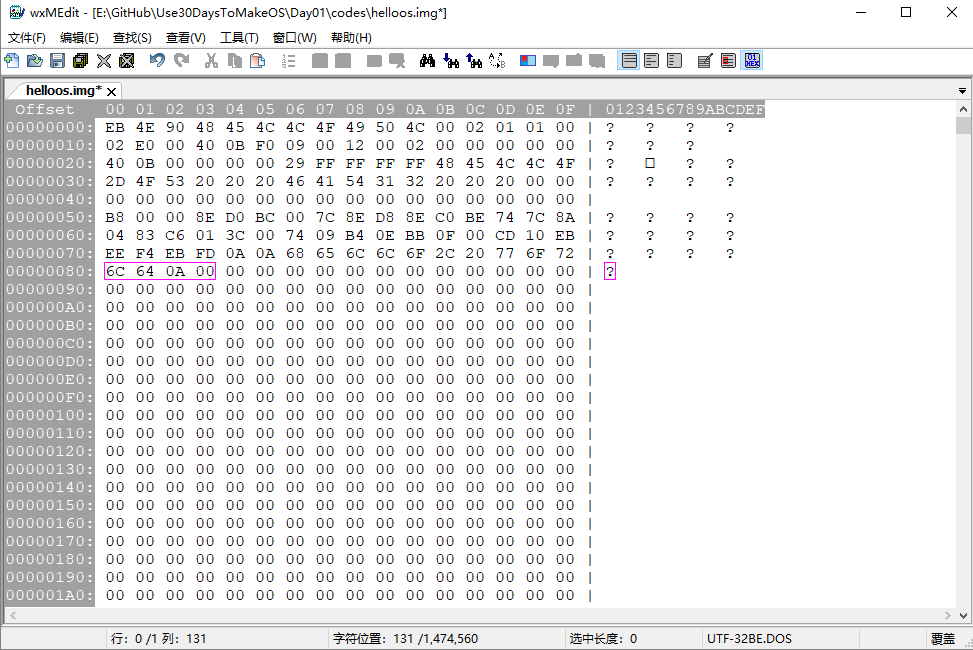
Note the end of line 000001F0 and the start of line 00000200:
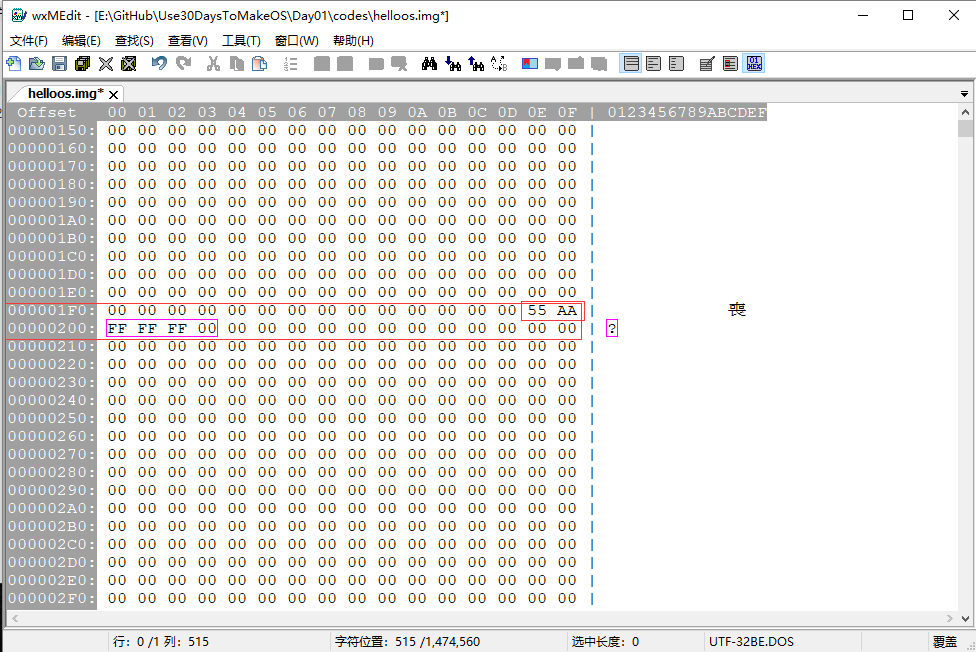
And the start of line 00001400:
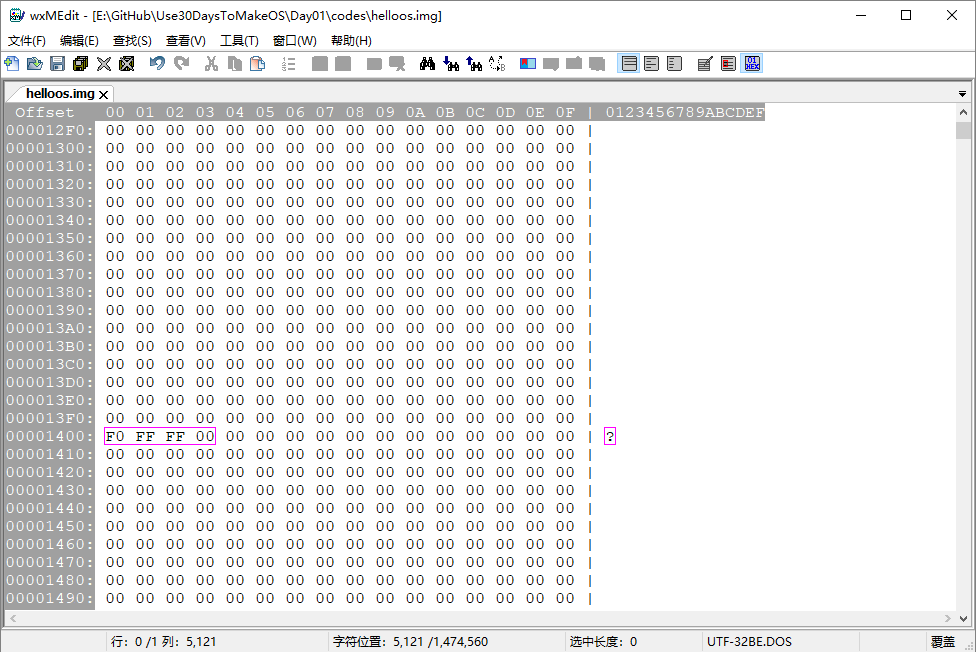
That’s it, the img file is done.
Booting it from a floppy in a virtual machine#
Open VMware:
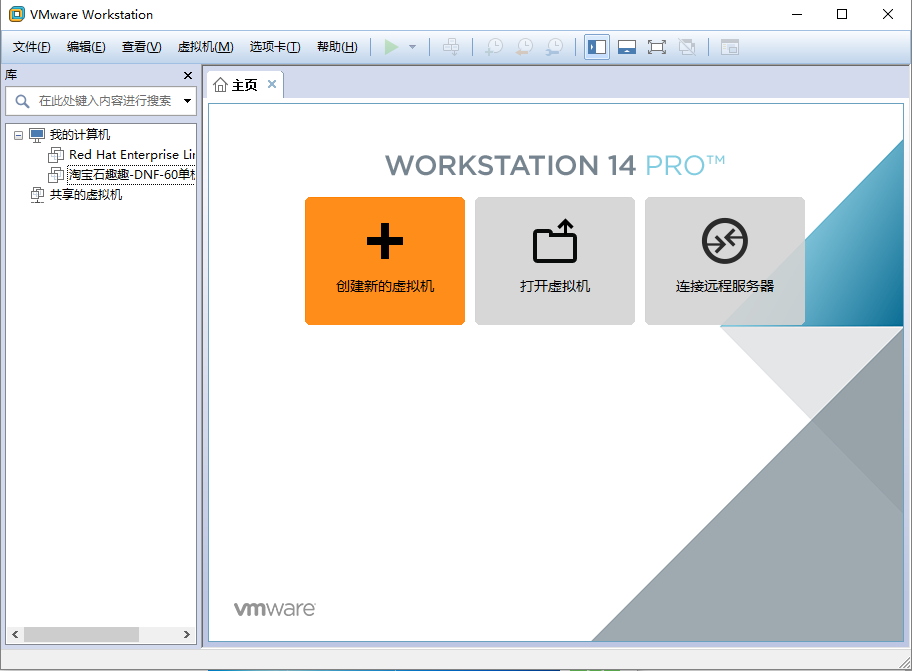
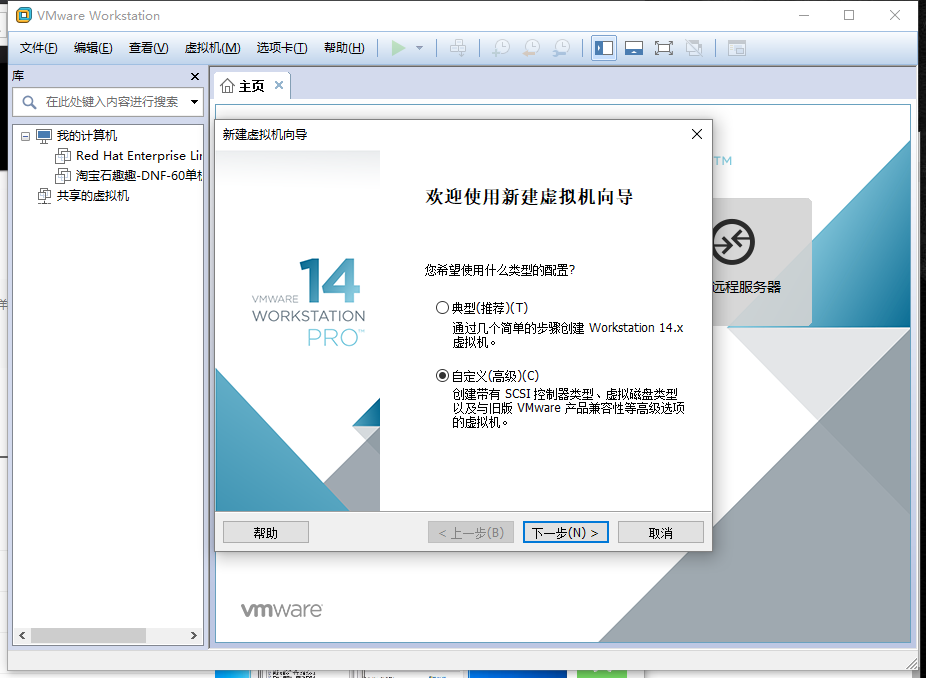
Click “Create a New Virtual Machine”, choose Custom, then Next:
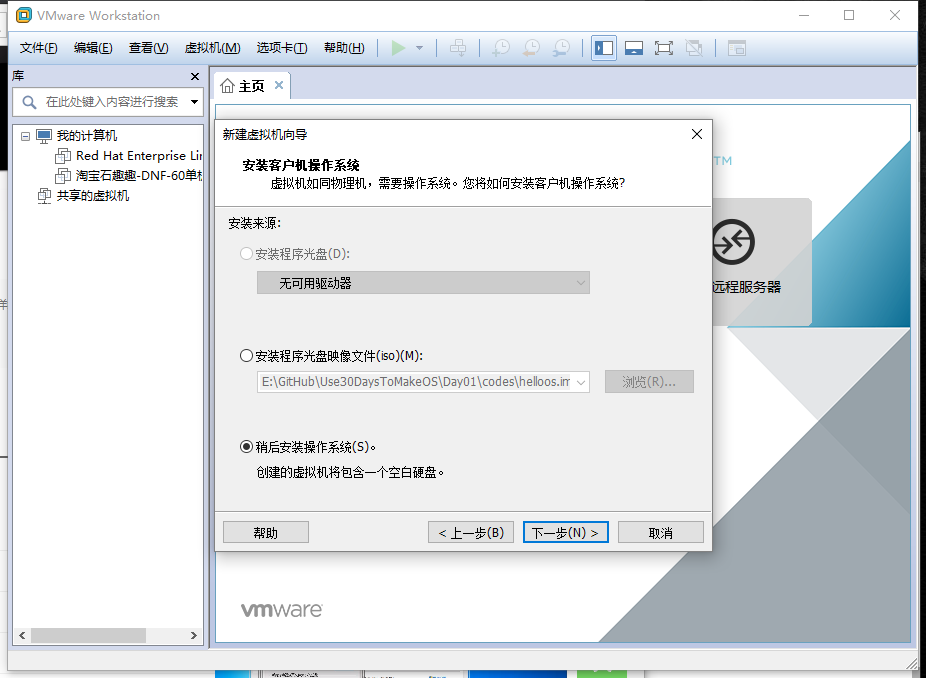
At this step, choose “I will install the operating system later”:
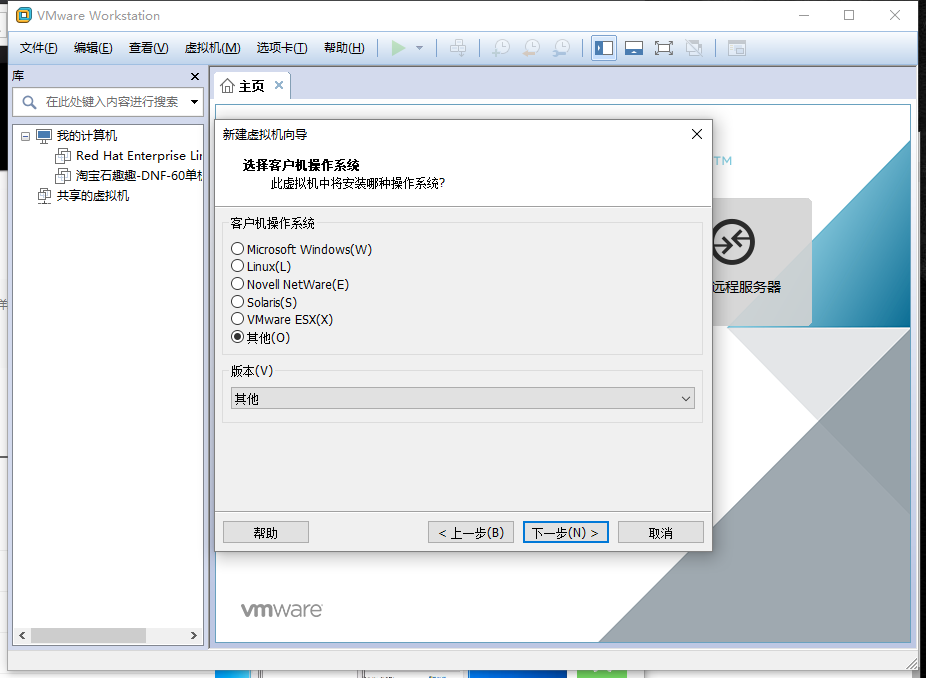
Then choose “Other” for everything on this step:
Configure the rest however you like and keep clicking Next.
When it’s done, click “Edit virtual machine settings”; we need to add a floppy drive to the VM:
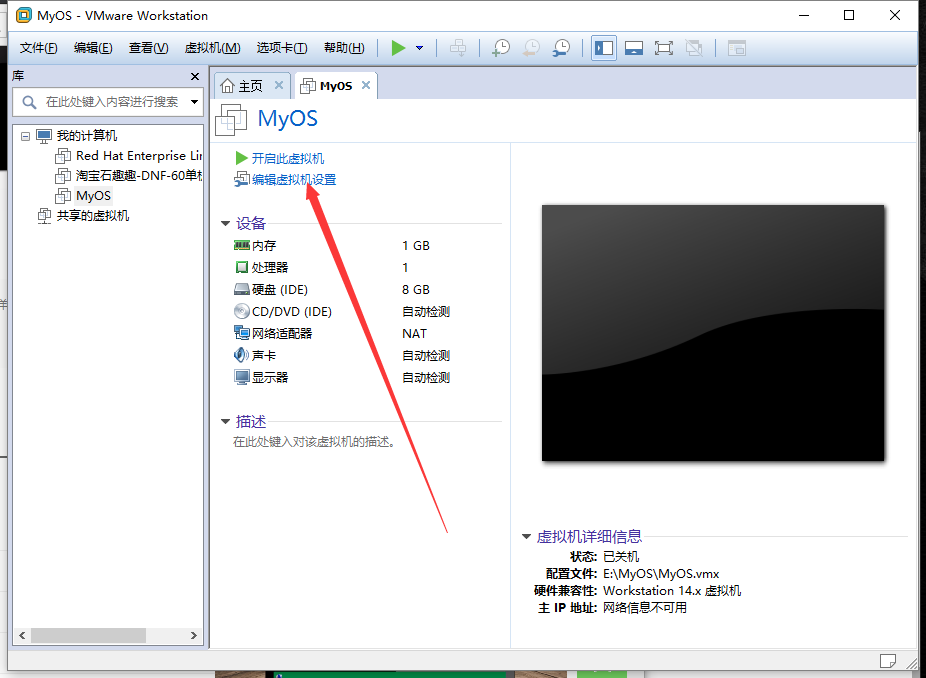
Click “Add”:
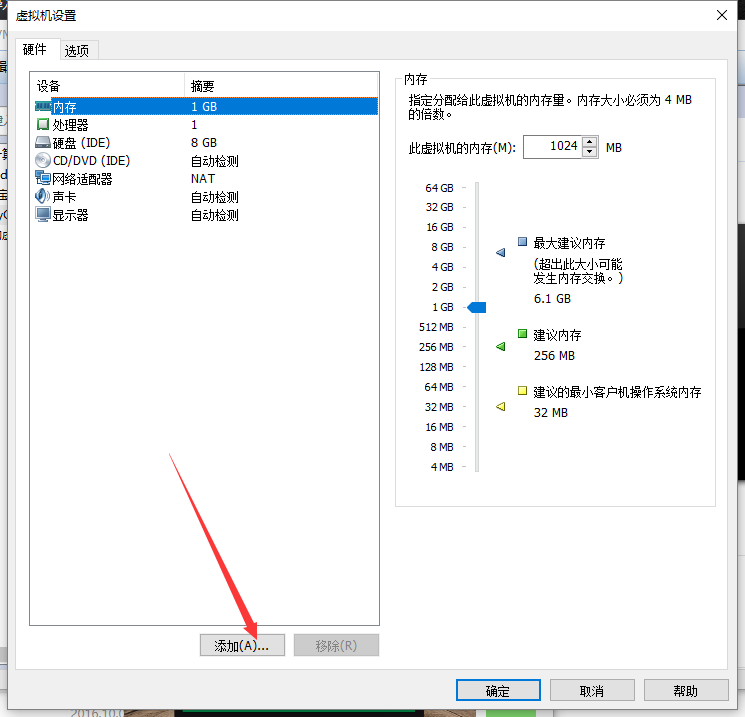
Choose “Floppy Drive”:
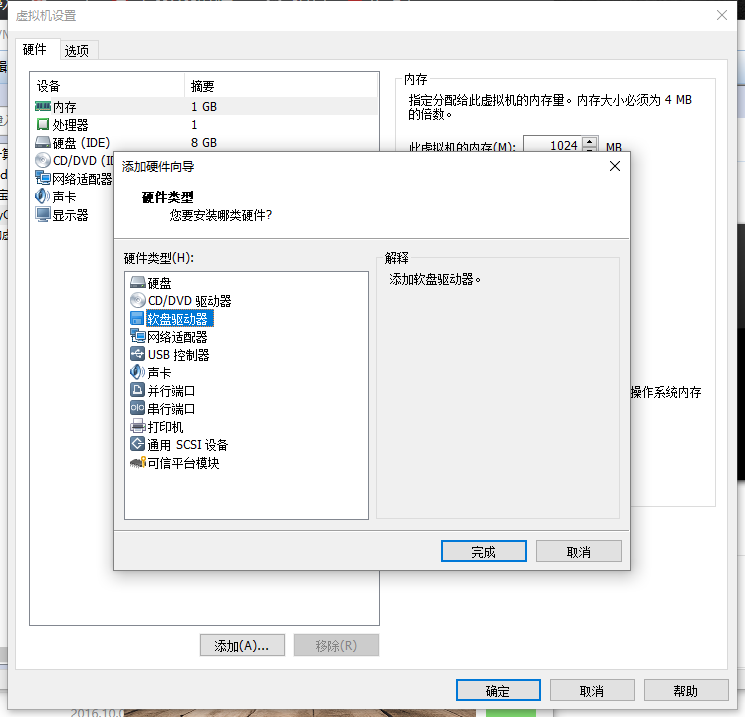
Finally, tick “Use floppy image file”, click “Browse”, select the helloos.img we just edited, and confirm.
Now you can run it. If it says it cannot connect ide1:0, just click Yes; we’re not worrying about the hard disk for now.
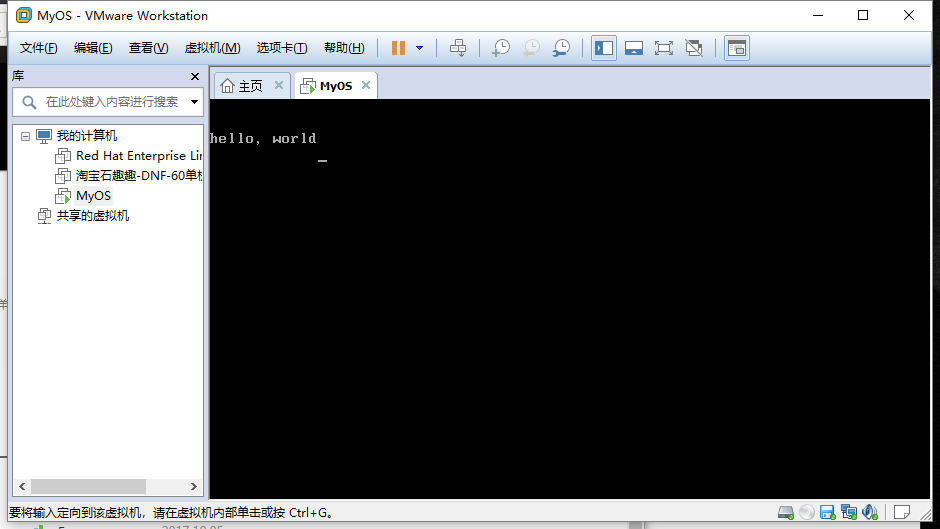
In the end it shows hello, world:
Writing assembly in Visual Studio Code#
Typing hex by hand nearly killed me. How about you?
Luckily there’s assembly. Assembly introduces mnemonics, so we don’t have to write raw machine code; the assembler turns our assembly source into machine code.
Open VS Code. You can install an x86 assembly extension for highlighting, but it doesn’t really matter.
Type in the following:
; hello-os
; TAB=4

; code for a standard FAT-32 floppy

    DB      0xeb, 0x4e, 0x90
    DB      "HELLOIPL"      ; name of the boot sector
    DW      512             ; size of each sector (bytes), must be 512
    DB      1               ; cluster size (sectors), must be 1
    DW      1               ; where the FAT starts, usually the first sector
    DB      2               ; number of FATs, must be 2
    DW      224             ; size of the root directory (entries), usually 224
    DW      2880            ; size of this disk (sectors), must be 2880
    DB      0xf0            ; media type, must be 0xf0
    DW      9               ; length of the FAT (sectors), must be 9
    DW      18              ; sectors per track, must be 18
    DW      2               ; number of heads, must be 2
    DD      0               ; no partitions, must be 0
    DD      2880            ; disk size again
    DB      0, 0, 0x29      ; fixed
    DD      0xffffffff      ; probably the volume serial number
    DB      "HELLO-OS   "   ; disk name (11 bytes)
    DB      "FAT12   "      ; format name (8 bytes)
    RESB    18              ; skip 18 bytes

; program body

    DB      0xb8, 0x00, 0x00, 0x8e, 0xd0, 0xbc, 0x00, 0x7c
    DB      0x8e, 0xd8, 0x8e, 0xc0, 0xbe, 0x74, 0x7c, 0x8a
    DB      0x04, 0x83, 0xc6, 0x01, 0x3c, 0x00, 0x74, 0x09
    DB      0xb4, 0x0e, 0xbb, 0x0f, 0x00, 0xcd, 0x10, 0xeb
    DB      0xee, 0xf4, 0xeb, 0xfd

; message

    DB      0x0a, 0x0a          ; two newlines
    DB      "hello, world"
    DB      0x0a                ; newline
    DB      0

    RESB    0x1fe-$             ; fill with 0x00 up to 0x001fe
    DB      0x55, 0xaa          ; boot signature 55aa

; output outside the boot sector

    DB      0xf0, 0xff, 0xff, 0x00, 0x00, 0x00, 0x00, 0x00
    RESB    4600
    DB      0xf0, 0xff, 0xff, 0x00, 0x00, 0x00, 0x00, 0x00
    RESB    1469432
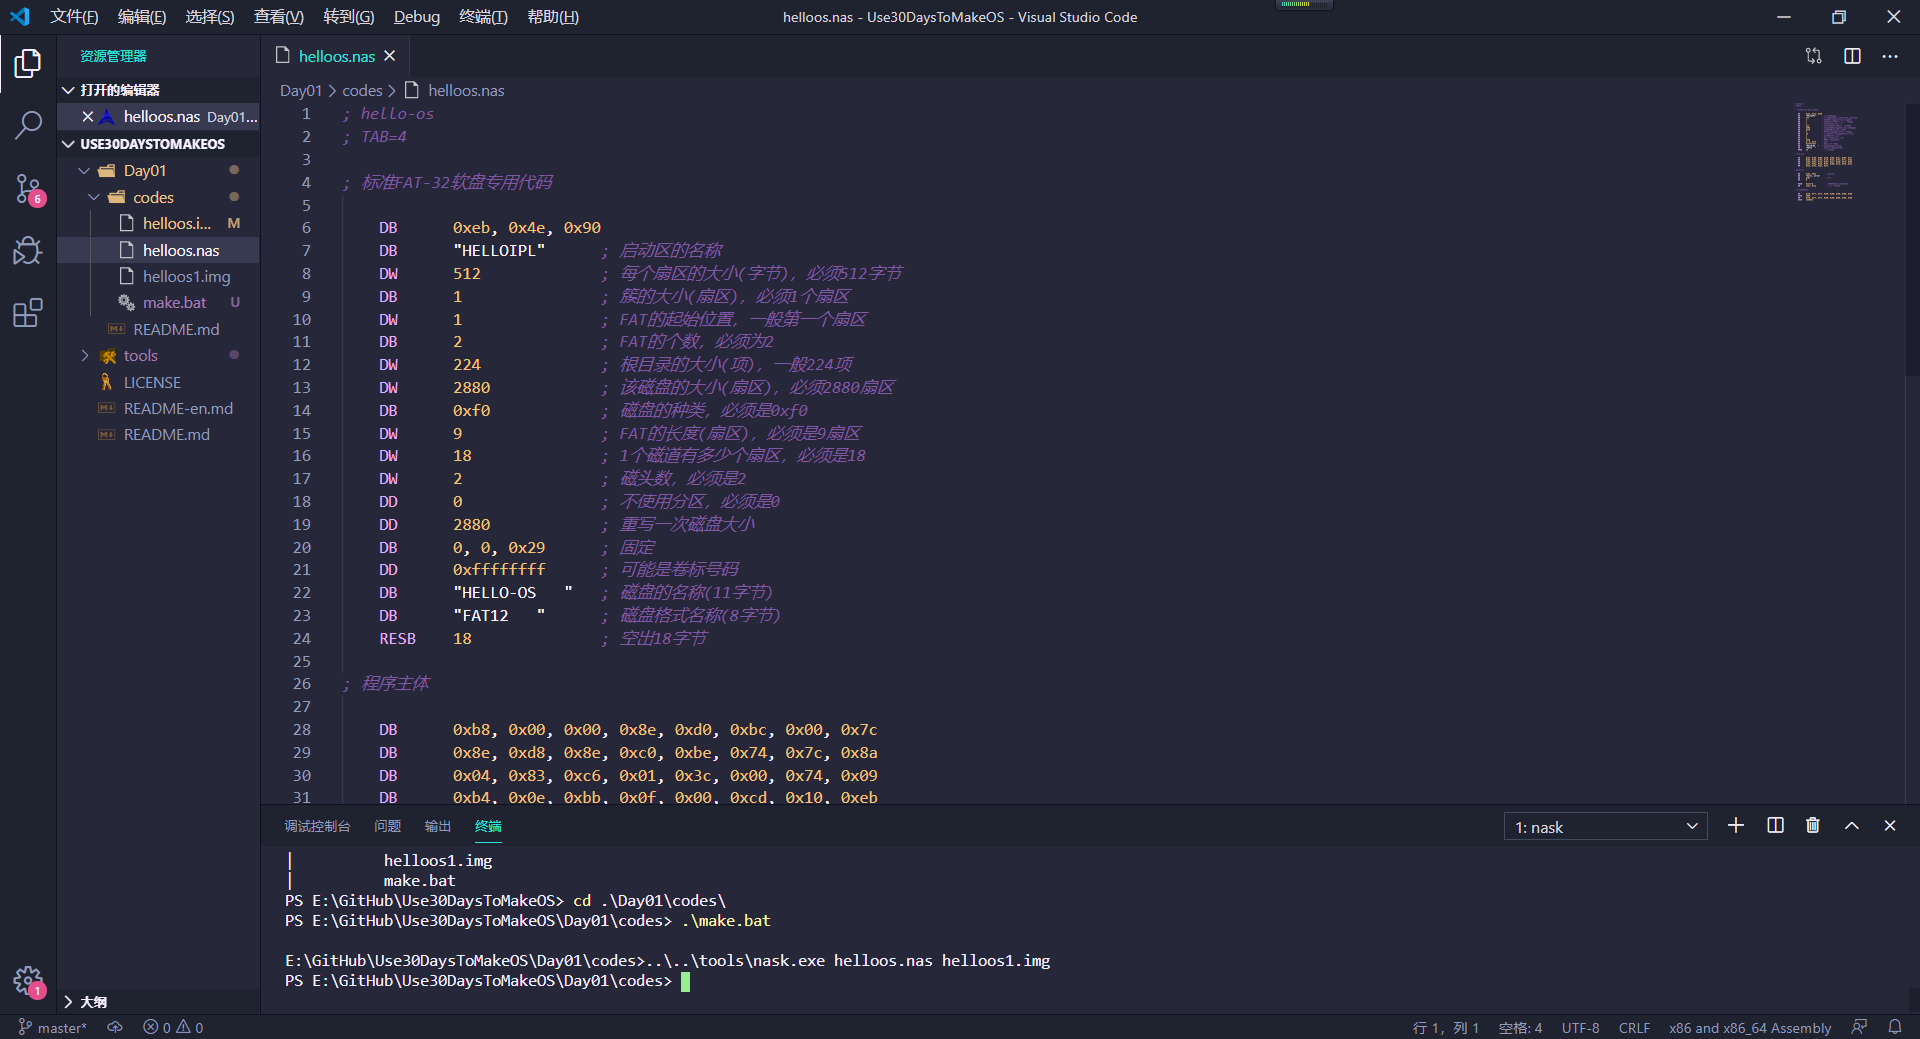
Then, in the console, use nask.exe to generate the img file.
The syntax is:
nask.exe ***.nas ***.imgFirst, use tree /f to look at the current directory tree and all its files:
E:.
│  LICENSE
│  README-en.md
│  README.md
│
├─Day01
│  │  README.md
│  │
│  └─codes
│          helloos.img
│          helloos.nas
│          helloos1.img
│
└─tools
        nask.exe
        README.md
In the Day01->codes folder, create a batch file make.bat:
..\..\tools\nask.exe helloos.nas helloos1.img.. is the parent directory of the bat file, so ..\.. is actually Use30DaysToMakeOS, my root directory, and ..\..\tools is Use30DaysToMakeOS\tools.
So running make.bat in the codes folder generates helloos1.img in the current folder (codes):
Finally, point VMware at helloos1.img and give it a test run:
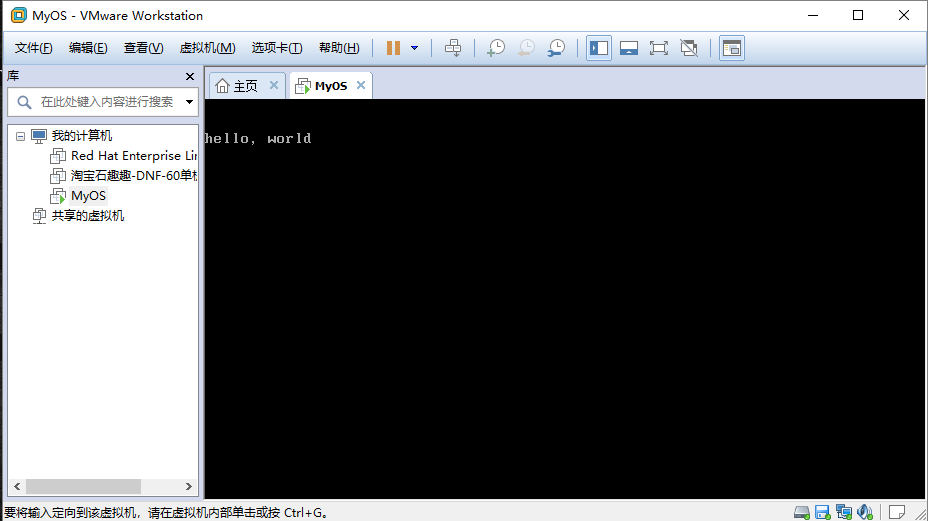
Same result.
After all, assembly just simplifies the process; the final bytes are exactly the same.
Comments